Importing into Auction Flex
After you export your auction from Lot Lingo, you'll bring it into the Auction Flex desktop program in two separate imports:
- Lot data — a spreadsheet (.csv) imported through the Inventory Import wizard.
- Images — a folder of photos imported through the Batch Image Import wizard.
Which Auction Flex? This guide is for the desktop Auction Flex program. If you use Auction Flex 360 (the cloud version), your import screens will look different.
Tip — back up first. Auction Flex recommends making a backup before any import: Miscellaneous → System Maintenance → Backup.
Part 1 — Import your lots (CSV)
In Lot Lingo, use Auction Actions → Export Lots to download your .csv file, then follow the steps below in Auction Flex.
What the columns are
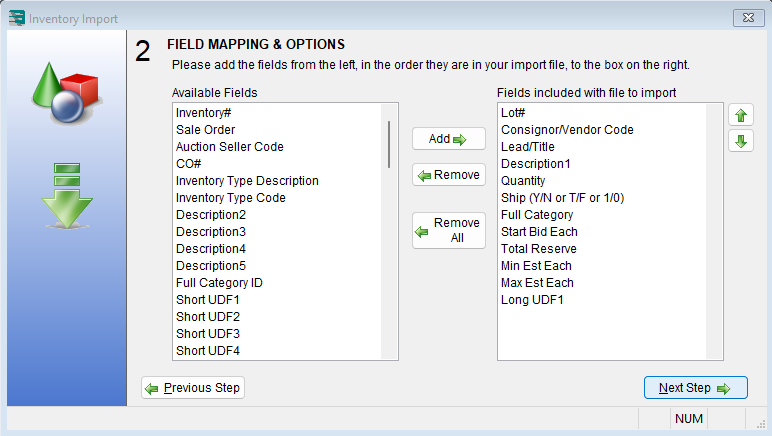
Your exported file has 12 columns in this exact order. In Step 2 you'll line these up with Auction Flex's field list — top to bottom, same order.
| # | Column in your file | Auction Flex field to pick |
|---|---|---|
| 1 | Lot# | Lot# |
| 2 | Consignor/Vendor Code | Consignor/Vendor Code |
| 3 | Lead/Title | Lead/Title |
| 4 | Description1 | Description1 |
| 5 | Quantity | Quantity |
| 6 | Ship | Ship (Y/N or T/F or 1/0) |
| 7 | Full Category | Full Category |
| 8 | Start Bid Each | Start Bid Each |
| 9 | Total Reserve | Total Reserve |
| 10 | Min Est Each | Min Est Each |
| 11 | Max Est Each | Max Est Each |
| 12 | Long UDF1 | Long UDF1 |
Step 1 — File Selection
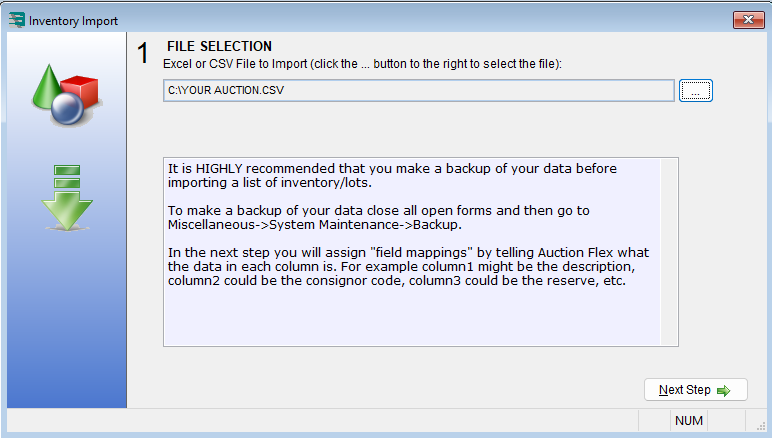
Open Inventory Import. Click the ... button and choose the .csv file you exported from Lot Lingo.
Step 2 — Field Mapping & Options
Add each field from Available Fields (left) to Fields included with file to import (right) in the same order as the table above. Use the green up/down arrows to fix the order if needed.
Step 3 — Field Mapping Review
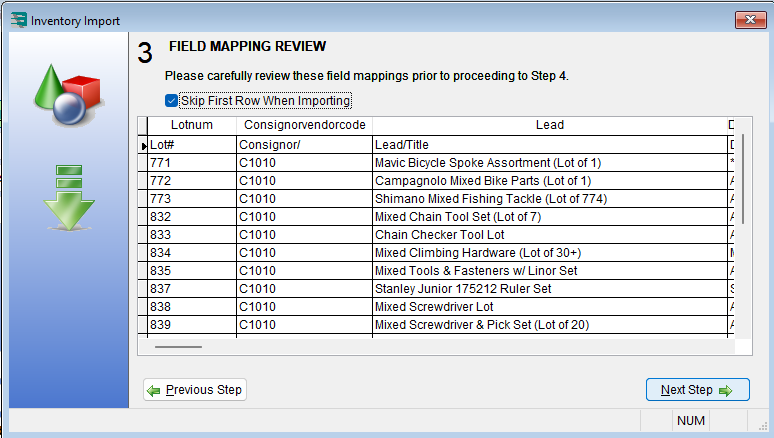
Check Skip First Row When Importing — your file has a header row, and this stops the headers from being imported as a lot. Review the preview grid to confirm each column landed in the right place.
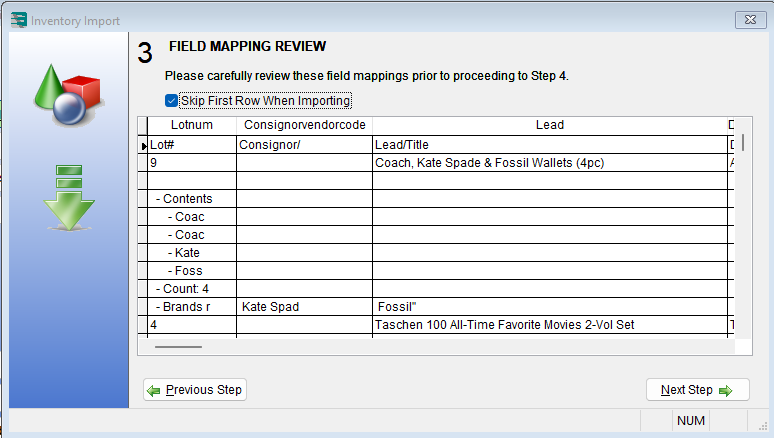
Don't worry if the preview looks like the example below, with a description broken across several rows. This is normal and safe to import. Auction Flex just displays descriptions oddly in this review when they contain line breaks — each lot still imports correctly as a single description.
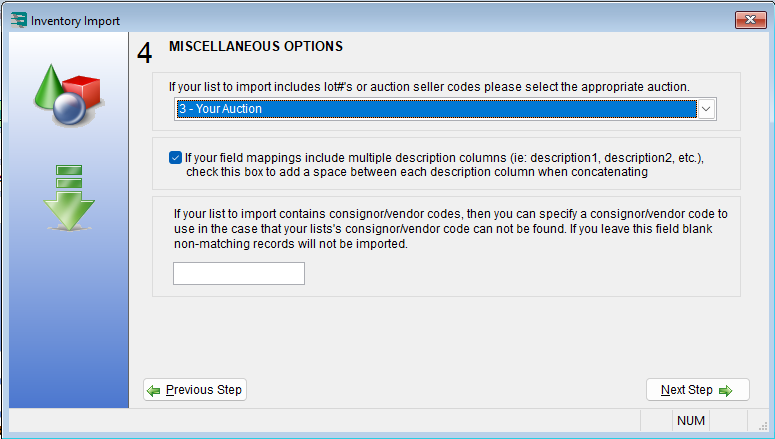
Step 4 — Miscellaneous Options
Choose the auction your lots should import into. Leave the "space between description columns" checkbox as-is — Lot Lingo exports a single description column. If a consignor/vendor code isn't found, that record is skipped; enter a fallback code here, or make sure all your consigner codes already exist in Auction Flex.
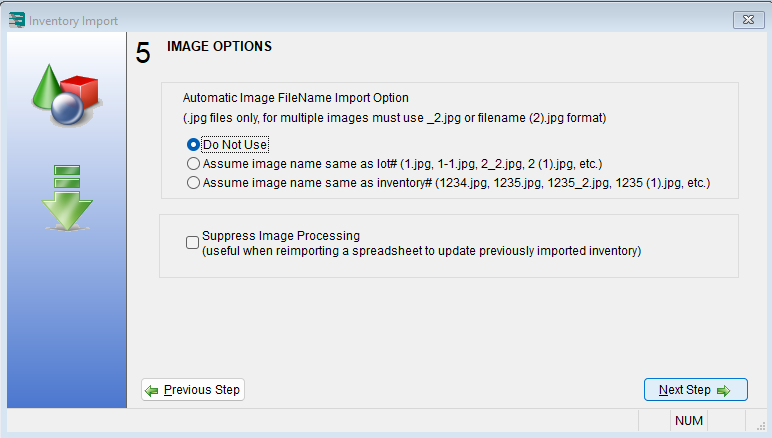
Step 5 — Image Options
Select Do Not Use. Images are imported separately in Part 2, so there's nothing to do here.
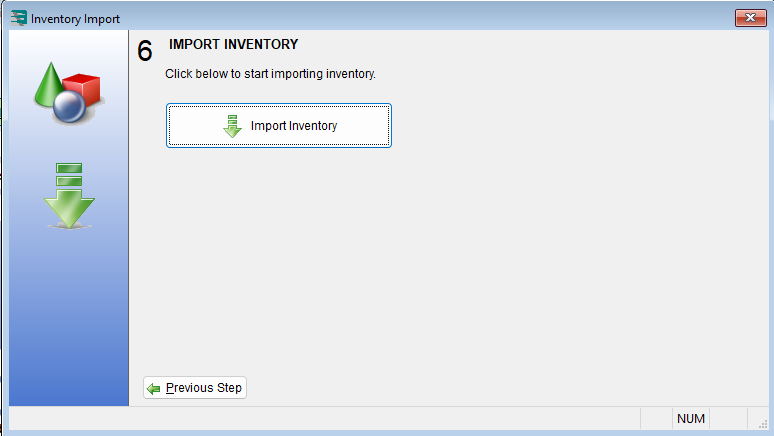
Step 6 — Import Inventory
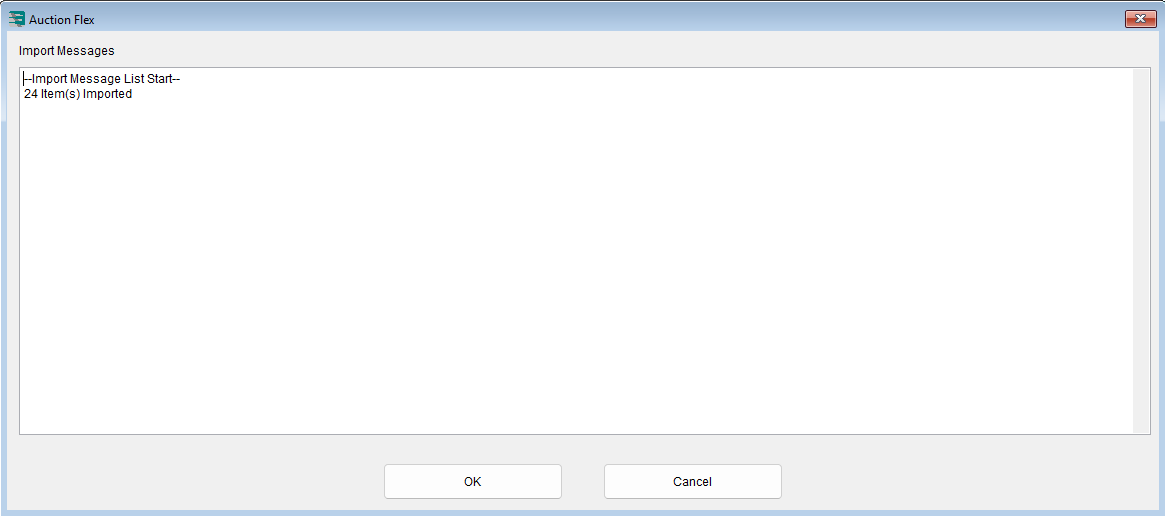
Click Import Inventory to run the import. When it finishes, Auction Flex shows how many lots came in — for example, 24 Item(s) Imported.
Part 2 — Import your images
In Lot Lingo, use Auction Actions → Export Images to download a ZIP of your photos. The files inside are named by lot and photo order — for example 771-1.jpeg, 771-2.jpeg.
Prepare the folder (Windows)
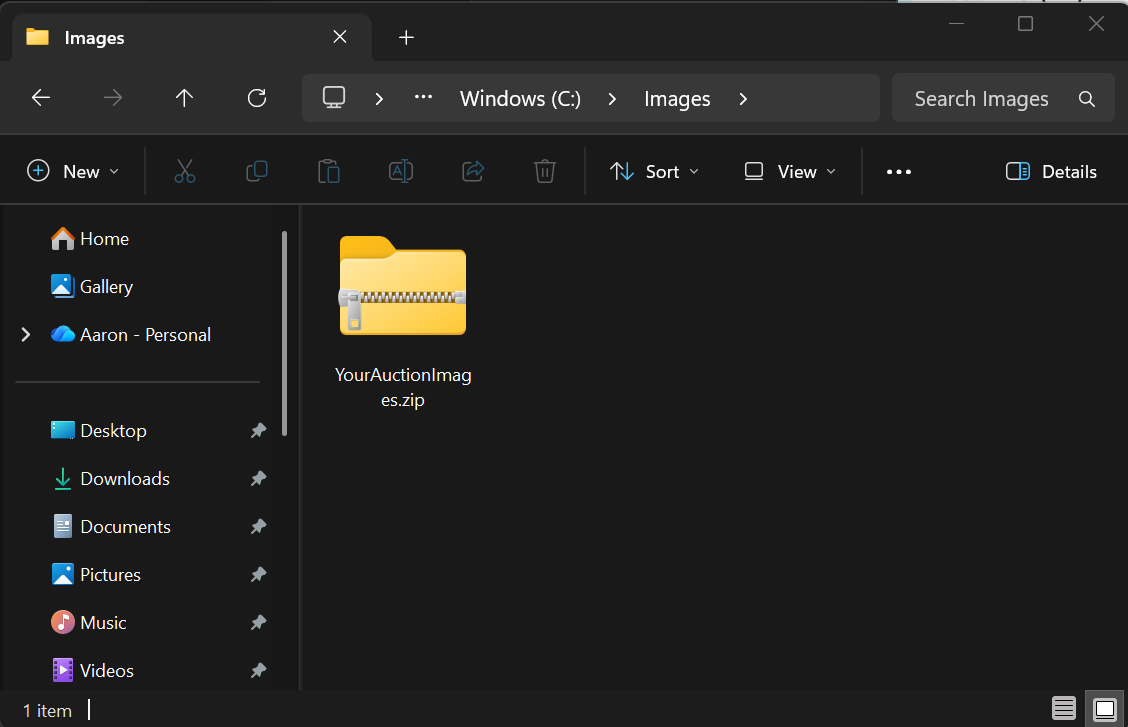
1. Find the downloaded ZIP (for example YourAuctionImages.zip).
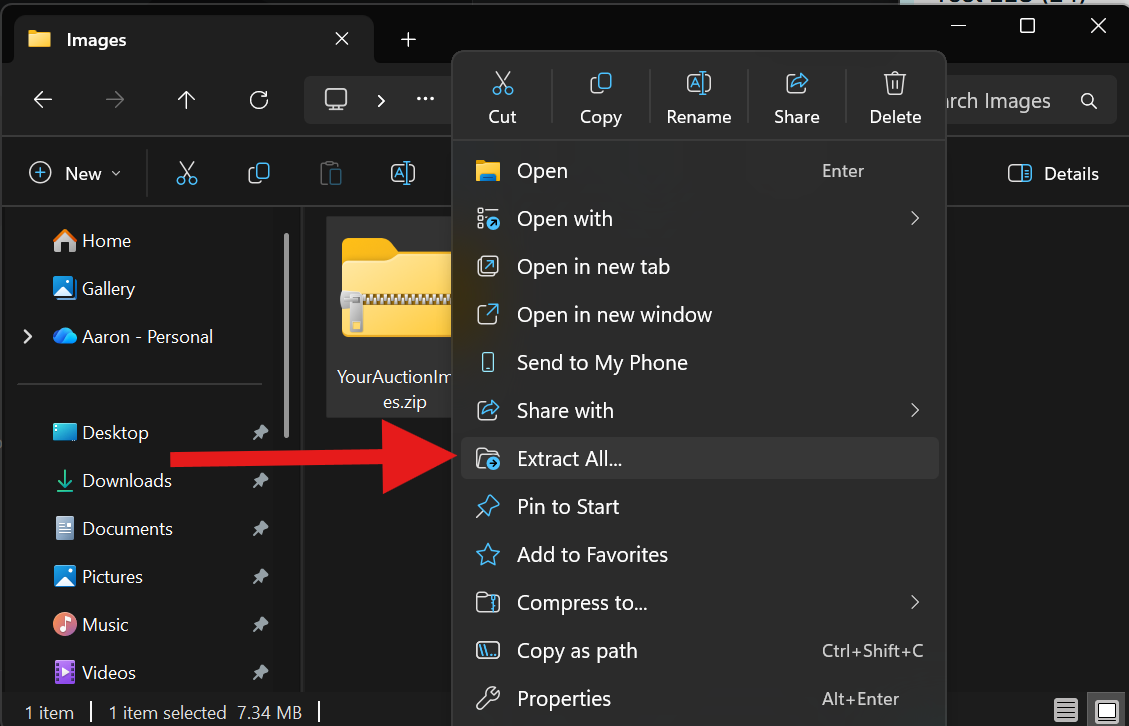
2. Right-click it and choose Extract All… from the menu.
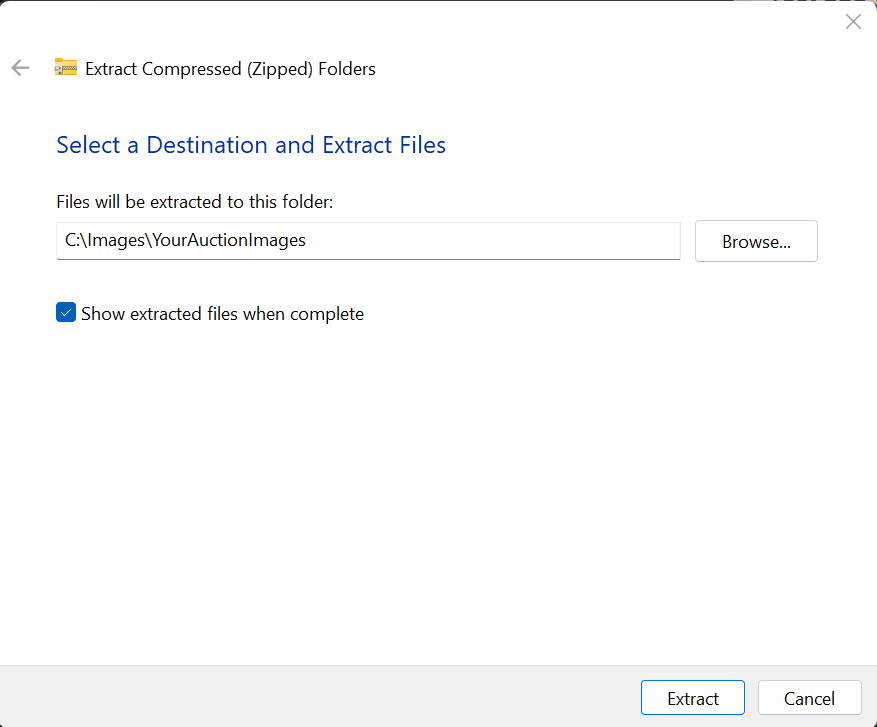
3. Pick a folder to extract to (for example C:\Images\YourAuctionImages) and click Extract.
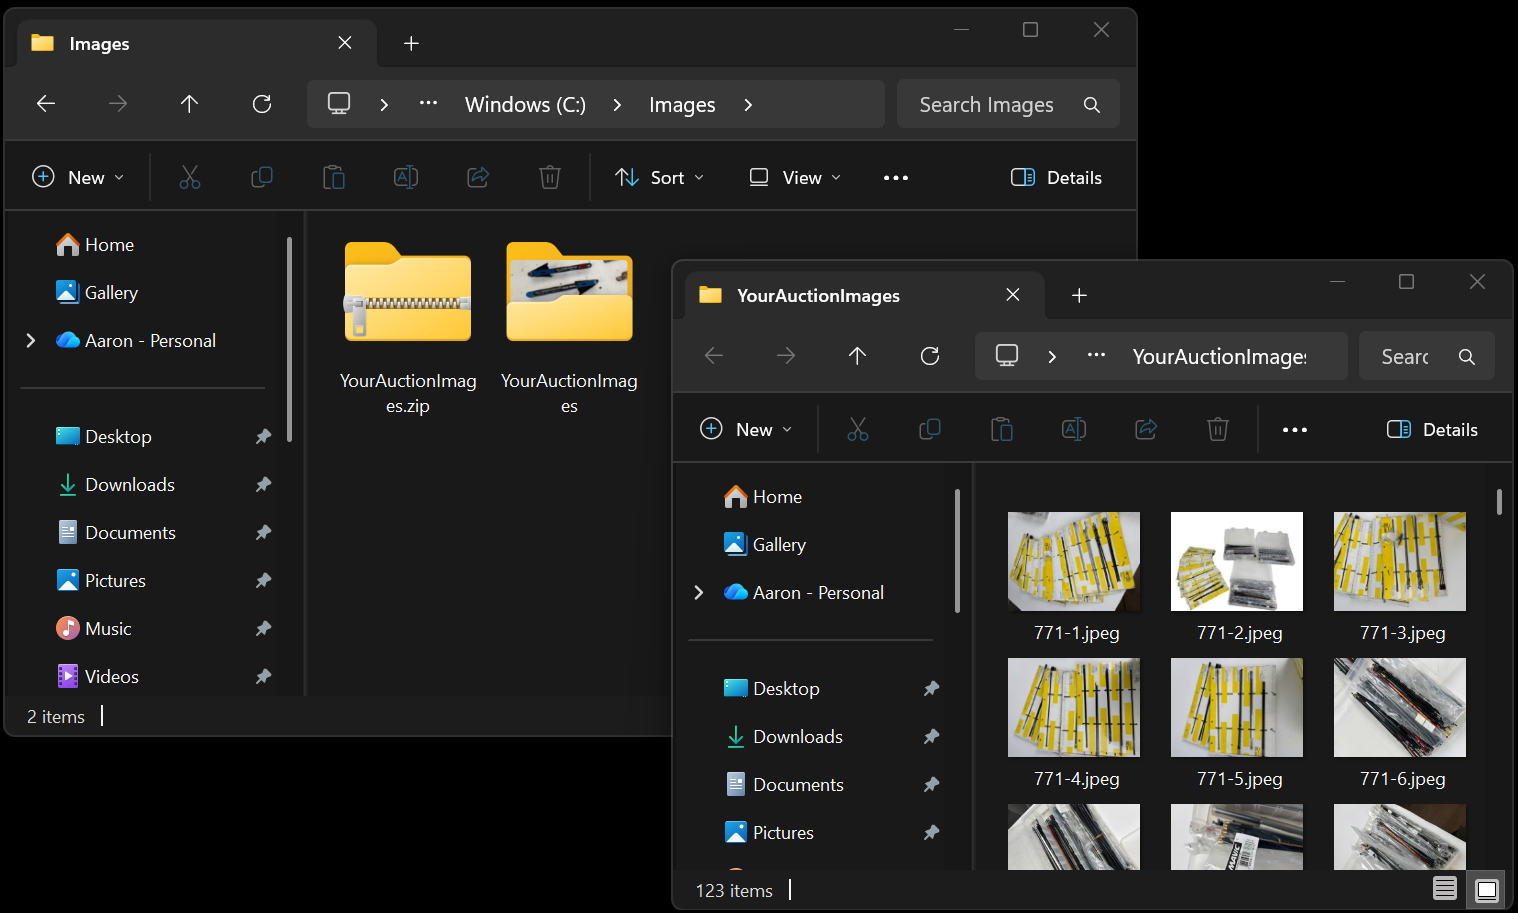
4. Confirm the photos extracted and are named like 771-1.jpeg, 771-2.jpeg.
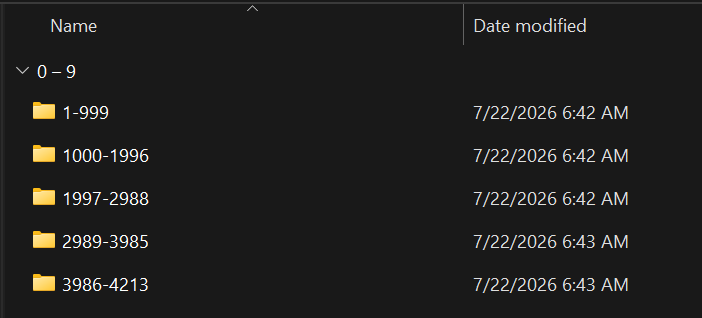
Large auctions. If your auction has more than 1,000 images, Lot Lingo splits the photos into numbered subfolders — 1-999, 1000-1996, and so on — with up to 1,000 images each. This keeps a large batch from overwhelming Auction Flex's import. When you see folders like this, run the Batch Image Import steps below once for each folder.
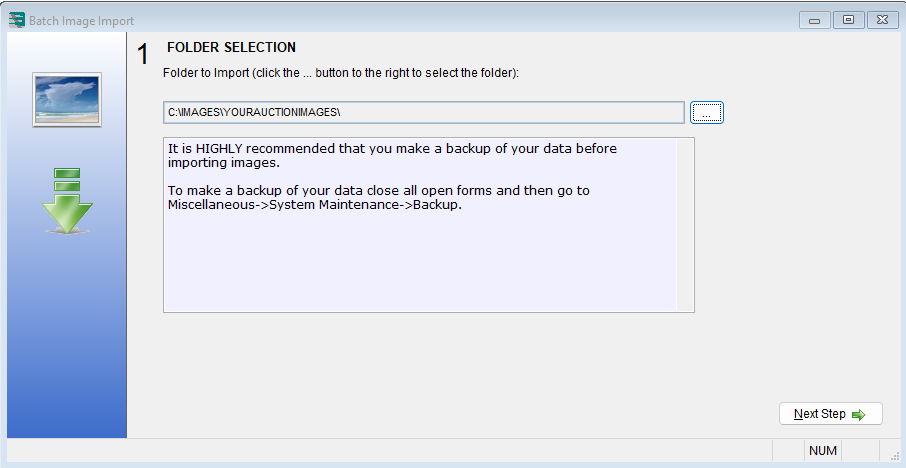
Step 1 — Folder Selection
Open Batch Image Import in Auction Flex. Click the ... button and select the folder you just extracted.
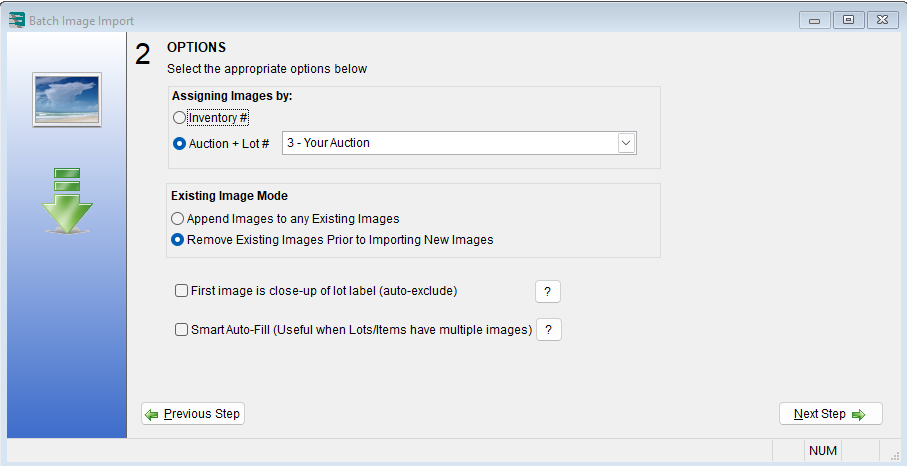
Step 2 — Options
Set Assigning Images by → Auction + Lot #, then select your auction. Choose an Existing Image Mode: "Remove Existing Images Prior to Importing" for a clean import, or "Append" to add to what's already there. The two checkboxes are optional.
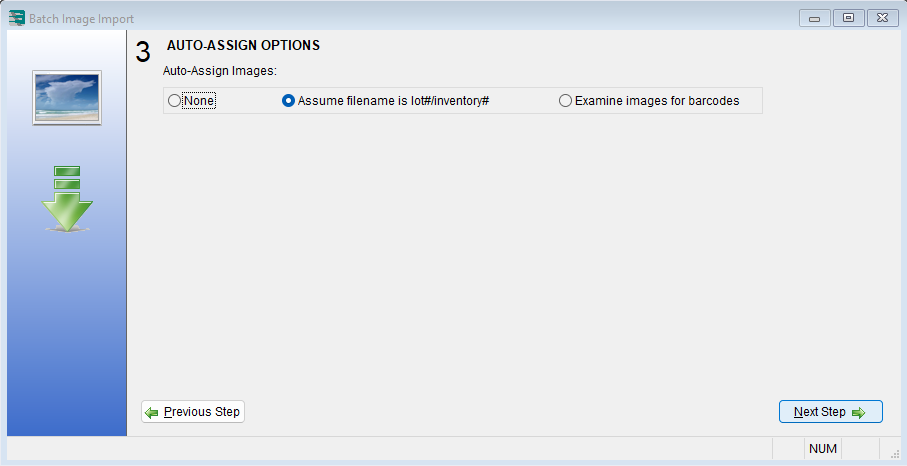
Step 3 — Auto-Assign Options
Select Assume filename is lot#/inventory#. This matches Lot Lingo's file naming so each photo attaches to the right lot automatically.
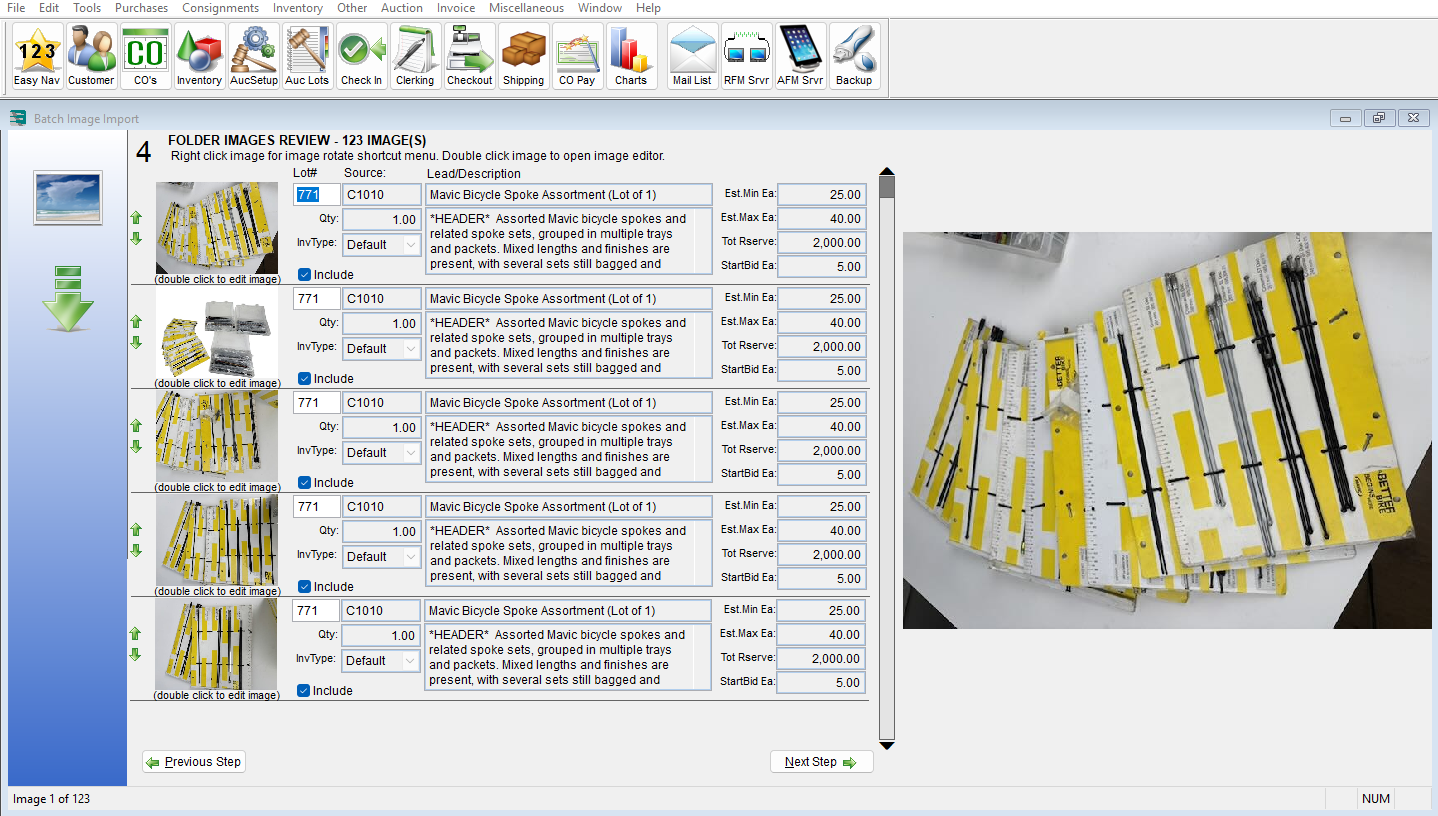
Step 4 — Folder Images Review
Review how the photos matched to your lots. Leave Include checked for the images you want. You can right-click an image to rotate it or double-click to open the editor.
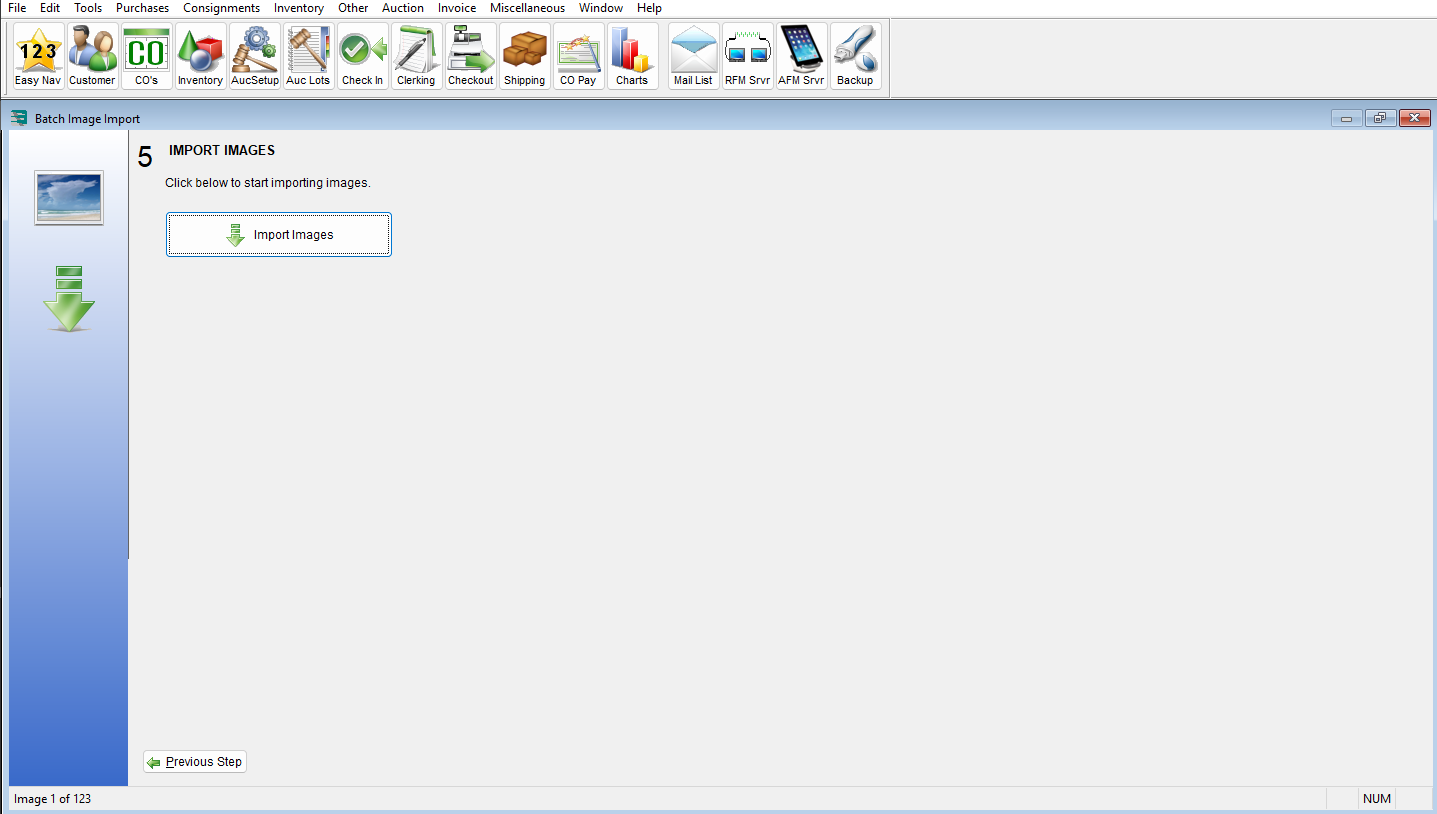
Step 5 — Import Images
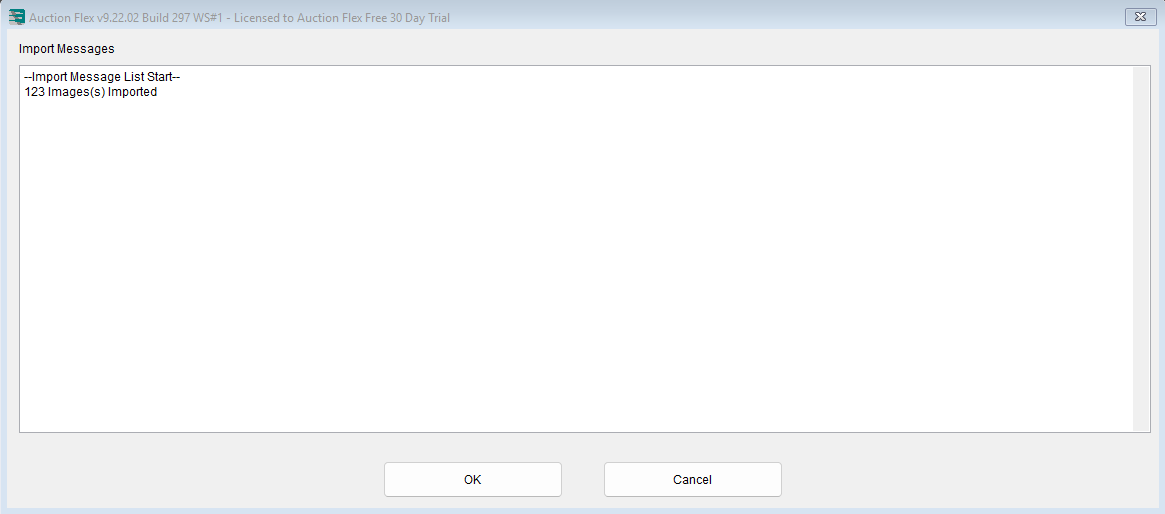
Click Import Images. When it finishes, Auction Flex reports how many photos came in — for example, 123 Image(s) Imported.
Tips & troubleshooting
- Some of my lots did not import into Auction Flex. Why?
- The most common cause is a consignor/vendor code in your file that does not exist in Auction Flex. Either add the codes in Auction Flex first, or set a fallback code in Step 4 of the Inventory Import wizard so non-matching rows still import.
- A lot imported without a category. How do I fix it?
- The category value must exactly match an Auction Flex category. Pick the closest matching category in Lot Lingo and export again — the corrected value will map on the next import.
- Why is my description split across several rows during import?
- That's a display quirk in Auction Flex's Step 3 preview grid only. Lot Lingo now exports descriptions with their formatting preserved, and Auction Flex keeps the line breaks in the imported lot — the description imports correctly even though the preview looks broken up.
- My photos did not attach to the right lots. What happened?
- Confirm the image files are named like {lot}-{number}.jpeg (for example 771-1.jpeg) and that you chose "Assume filename is lot#/inventory#" in Step 3 of the Batch Image Import wizard.